Pages

Friday 31 January 2014

First Quilt Finally Finished

Do you remember your first? 

Well, I finally finished my first (that was quite the alliteration).


Apparently I'm not that sentimental because I don't really remember much about the genesis of this quilt, or why I chose these particular colours and pattern. Frankly, because it's been that long (although to be fair half the time I can't remember what happened yesterday).

I do remember that I made the pattern up myself and thought I was being all clever, until I started to look around the Internet and saw all sorts of the same thing. Sigh... Oh well, some days I'm clever...I think...

But none of that matters as the thing is done.

Yep, fence pic again.

I gave myself permission to do nothing yesterday because I've been running around like a mad person doing heaven knows what for the past couple of weeks. I thought a day where I wasn't hauling kids in and out of a car doing like a million errands would be a good thing. You know, a time to slow down and not go anywhere. Maybe even have a nap. Gosh a nap...just the word is lovely!


More fence pics, and windy...again. Blast you North Wind!


So in my "free" time I decided I was going to finish this quilt that has been sitting around forever. It just needed a binding for heavens sake. But my problem has been my indecisiveness on what colour the binding should be. Geez, you might think I was deciding which arm to cut off.

Finally, when I decided yesterday what colour I wanted for the binding, I of course didn't have what I wanted at home. That meant we had to go 'somewhere'. Then I decided if I was headed to the city I'd do some other errands that needed to be done. So much for our do nothing day.
 
I couldn't find the exact colour I wanted for the binding at the local fabric store so I gave up and let my second in command (second son) decide. The rainbow colours actually work okay with the quilt. I used some straight stitching for the quilting. Well, I'm calling it straight stitching, some aren't quite so... um... straight. But it was my first time, so you know, it was sloppy and awkward as most first times are.
But in the end it got done. I used a zigzag stitch on the binding. I don't mind the look and using that stitch was quick.
The quilt itself is a survivor of one of great paint disasters of 2013 (see here and scroll down a little, if you dare). I should make it a T-shirt that says "I Survived Paint Disaster No. infinity". Seriously, I can't believe it came through the whole ordeal with a small little smidgen of paint. The quilt was destined for someone else, but it now belongs to the person who got paint on it.


This also qualifies as my first finish of my FAL list. Hurray!

Linking up with all the finishers: Crazy Mom Quilts 

Tuesday 28 January 2014

A WIP and a Finish

Hello?
 It feels like its been a long time since I've put anything on this blog. Okay so maybe like a week or something. Still, are days in the blogging world measured in years?! Probably, the Internet feels like a different dimension some days, but the general lag in me not posting is because I've been busy working like a busy little bee! Just buzzing around busy! Just doing busy things! Like a bee..you know..
But somehow still working on the Feathers quilt. I feel like this has been dragging along, although I'm getting close to being done the top.
And then someone learned to crawl this week. You forget all the things that someone at crawling level can get into. Like chewing on mom's finished paper pieced blocks.


And I finished something! Hurray! (um... but it's not a fabric thing, so if that offends you, then look away my friends...but come back later)

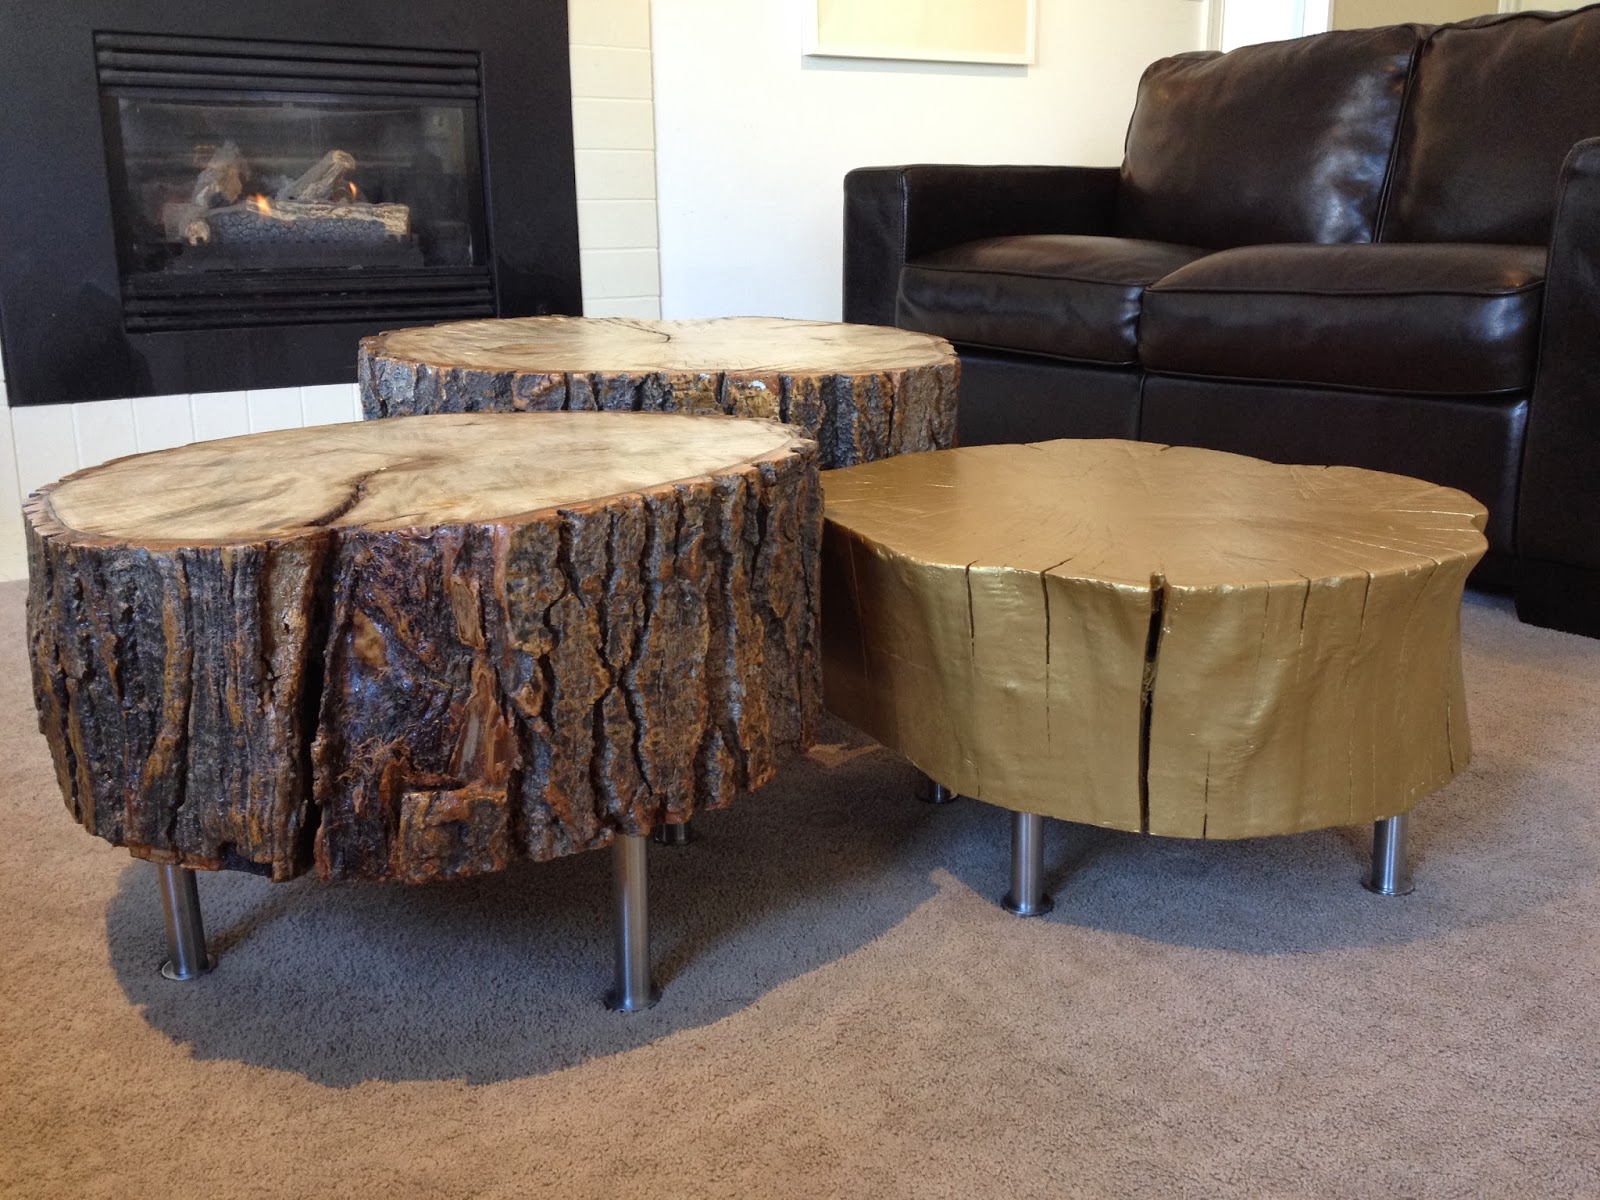
I finally forced myself to put the last coat of sealant on the logs I made into coffee tables. I saw the idea at a home decorating place. It was a table made out of a large stump painted gold. I loved the look, but not the price tag. Especially when I knew where I could get some stumps. (I'm working on getting the crocodile skull hehe).


So thanks to my sister and me, and our non-tree hugging sentiments, we had stumps (that's a lie, I am a tree hugger at heart, but the tree had to go my friends. I was afraid it was going to fall on my house. People just planted trees willy-nilly in this neighbourhood 30 years ago, so now we have huge poplars growing five feet away from another ginormous tree and they are all half dead...I could go on...)


Anyway, yeah, sorry the tree thing gets me going a little bit. Anyway, my sister also had a towering poplar that got cut down recently so I had the stumps. All it took was a little polycrylic and sanding.
At first I thought I might paint the stumps all gold, but then for variety I decided to keep two of them natural since they still had their bark on. Of course by the time I figured out I wanted two of them natural my second son had already painted them. So then I had to sand them, like a lot. Yay for power sanders!


I finished them with a polycrylic, which doesn't yellow like a polyurethane and can be cleaned up with water (hurray for no turpentine). The gold is a Martha Stewart paint. I wish the stumps were longer, but the guys who cut down the tree didn't realize that I would be wanting the stumps in the future and so they cut the trunk into small segments. So I had to add legs. The legs are from Ikea.The legs weren't my first choice, but were okay given what I wanted to spend on them.


The dark marks on the wood are from Roundup that was poured into the tree to kill it before they cut it down (I know, I know, her arbourist was autrocious. And to go off on yet another tangent, like I always do, I have sworn off of Roudnup altogether since I  heard about it and other GMOs on this conspiracy/doomsday radio show my husband always listens to. I make fun of him for listening to it, but that's yet another tangent). Anyway, crazy what a herbicide can do! I kept sanding them thinking the marks would go away, but they are throughout the whole trunk of the tree.


Then there was a very intent conversation had with the boys about not jumping on or off of the new living room additions. So far they have avoided using the tables as personal launch pads, although the eldest asked if he could practise dribbling his basketball on them (...like really, REALLY, you have to ask?!). They seem more interested on the space underneath, which they use as a car port and a place to habour superheroes- picture taken by request with Aquaman safely protected underneath.


Linking up:
Right Click to Save ImageWIP Wednesday at Freshly Pieced


Monday 20 January 2014

I Love to Procreate

Have you ever had those weeks where you feel like you've been doing a million things, but you've got nothing to show for it? It's been a couple of those weeks.

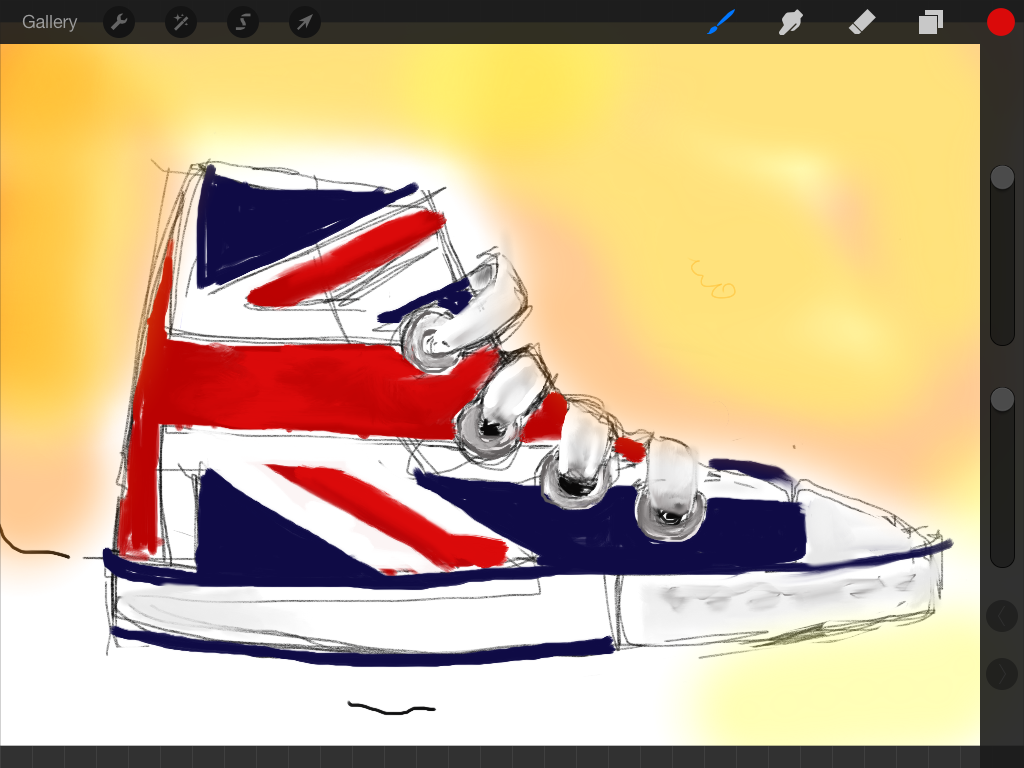
When I haven't been running around like a chicken with its head cut off, I've been totally crushing on this new app for my iPad called Procreate. I promised myself that this year I would do more drawing, sketching, etc. And although drawing with an actual pencil and paper trumps drawing digitally, I am getting to like the convenience of drawing on an iPad (ie. I can sketch in my bed). Which is ironic since a few years ago I could be heard saying I'd never get a tablet and why would a person even need one, etc. Now I find I use it everyday.


If I can find it. The boys also like my iPad. And maybe the testament to how much they like it is that they haven't broken it yet.

I also love this new stylus that I got called the Bamboo Stylus Solo. It was more expensive than your regular run-of-the-mill stylus you can buy (although not as expensive as this stylus I want). The Bamboo stylus has a smaller foam tip than most of the others, which allows you to see better where you are placing your stylus. I never thought of myself as a stylus kind of person, but now I am, I so am....

Procreate is great for sketching possible paintings. I'm able to use layers to help determine what background colour I want. By changing it out the background on the sketch I save myself from having to paint over it until I get the background colour I want (and the less I have paint out and about the better).


I've worked with Sketchbook Pro before, but I like the interface of this better and it seems to have more options in terms of brush size, opacity and such. I also like that you can export pictures in both .JPEG and .PNG formats. Overall a good buy and easy to learn to use. It also is not too expensive. I think it runs for five bucks.
Of course, I'm thinking about how I can use it in quilting design.

Friday 17 January 2014

Going Crazy..

I think I might be crazy. I've decided to piece a Death Star on the back of the quilt I'm making for my son. Because ya know, the front isn't even done... and I have a hundred other things to do, so I can like totally spend time on this. But it got into my brain and cannot be undone until it is done.

So I drew it out (there has got to be an easier way that does not involve me spending money on quilting software- or should I?)
I'm still working out how I'm going to do this. It's going to be biggish... like 50cm or so.

Am, I crazy? Can this be done? Am I biting off more than I can chew? Hints, comments, advice...all would be welcome at this point!
Linking up for help.
PPPQP

Refrigerator Box

So I've been working away since my children have been occupied with their new toy courtesy of the neighbours and their renovations.
A refrigerator box is the ultimate play thing.
It's a spaceship, a house, a Batcave...


A place where you can hide from mom and eat a WHOLE bag of CHOCOLATE!!!

I should have known. I emerged from my quilting haze and it was quiet. Like a birds-gone-silent-in-the-forest kind of quiet.
I called their names a couple of times and had no answer. I might mention here that I was standing not five feet from the box at the time.
Then I heard voices. Voices discussing whether they should answer me.
I found them covered in chocolate and wrappers (Hersey Special Dark- what kid eats that!)
Needless to say dinner didn't go over so well (since they'd already eaten their weight in chocolate).

So if you had a crappy week, find a box and a bag of chocolates and go hide for the weekend. Just make sure your mother doesn't catch you!

Saturday 11 January 2014

Finish Along 2014- Heaven Help Me, This is the List!

I'm one of those type of people that have a lot of things on the go or nothing at all. I'm like 20 minutes early or late. I'm super starving or not hungry. I have to watch every season of a show on Netflix all at once, or I don't watch anything for weeks. I have like a thousand projects to do or none.

I have like a thousand projects to do.

That's why I'm so glad that Katy at The Littlest Thistle is hosting this Finish-Along because I need it.
When I thought about the what to include for the FAL, I was only going to list the unfinished projects I thought I would get done, but now I think go big or go home, right?

Right, well at least they'll be staring at me in cyber space taunting my with their undoneness.

And I love making to-do lists. It's like my favourite thing in the world, especially when you get to cross one off the list. It feels great! (You know it does, so don't even pretend it doesn't! Sometimes I even write things down on my to-do lists just so I can cross them off.)

So here it is:
1. What I'm calling the Reception quilt. Need to finish FMQing it and put a binding on it.
2. Star Wars quilt. Was supposed to be done for Christmas. Enough said..
3. Feathers quilt. Part of a QAL, which means hopefully if I follow the deadlines it'll get done.
4. Clam quilt. Pulled this bundle and downloaded the pattern for it. Um.. yeah.. we'll see... It has curves, just saying.
5. 241 Tote. Ordered material specifically for this and bought the pattern. Haven't even printed the pattern off the computer.
6. Union Jack quilt. Pulled the fabric and promised it to my sister.
7. Disapearing 9-Patch quilt. Started this for fun. Promised it to my other sister. Now what......good thing I only have two sisters.
8. Triangle quilt. I re-purposed the cushion covers from the living room for this quilt. It's all cut out ready to go.
9. First quilt ever. Still needs a binding.


Now, the following projects aren't really part of the FAL and don't qualify for the prizes, but I don't care. The prize will be getting them done.  I'm putting them here for me, so I can see them and remember (cringe) every time I review this list.

1. Oil landscape. So close to being done and then it got painted on (yes, I know it's a painting and is suppose to be painted on, but by me, not others (guess who?))

2. Olliblocks. Suppose to be done for Christmas. The sanding got done and I glued some of the faces on, but that's it.

3. Smokers. They burn incense and it looks like they are smoking. It's a German tradition. I have one for Halloween and one for Christmas. Again, almost done and then some unfortunate painting happened (this time by the other guess who).

4. Log tables. Need one more coat of shellac and legs. For heaven's sake they need legs!!! (right now they are being used as stepping stones to cross and jump from couch to couch and not touch the "lava". Our living room has turned into a jungle gym).

There we have it. For better or for worse it's my list.
And it will get done.
By my big fat jeans, it WILL get done!!!


Finish Along 2014

Wednesday 8 January 2014

Feathers WIP

So I started the blog with the intent on documenting my sons destructive exploits, but since I've started blogging they haven't really destroyed anything. In fact, I have contributed to the chaos today by deciding to move the Christmas tree outside for pickup by myself, thus knocking things over and  flinging pine needles everywhere.

And geez, if I had known that the destruction would stop as soon as I wanted to blog about it I should have started blogging years ago!! It's like one of those mommy blogs that make money, except technically I guess I'm saving money.

Although, no word of a lie, just today, the eldest traded his Ipod for a Pokemon card. That trade was quickly kiboshed by mom (meaning me- I mean really, have I taught my children nothing about making good trades!).

In other news, the creating side carries on. I was suppose to be more like Michelangelo, you know, getting things done and such (see this post), but its been all Leonardo this week. Planning, drawing, sketching...it's mostly been trying to figure out fabric selection and placement for the Feathers QAL. which means the Star Wars quilt has been relegated to the WIP pile, which keeps getting larger. ...sigh...

The design looks a little busy right now. I'm hoping the solid light grey background I chose will help that. It's my first QAL and so far it's been fun though to look through the Flickr pics of the QAL and see all the different colours people are using for their own Feathers quilt.

I was being really productive today and even cut all the background pieces, only to realize that I cut the wrong grey fabric. Which meant I bought the wrong grey fabric. When I was planning I pulled a grey from the Star Wars stash that would suit the background of this new quilt perfectly. I assumed that it was the same grey that I get from my dealer (a.k.a my friend who runs our local fabric co-op). So I got more.
But it wasn't it. And I think the difference in hue is enough to make me not want to use it.

Original pick on left, wrong grey on right.

Even though it's already all cut.

Wah!! and Hell-in-the-Montana!!!! (that's a curse word in our house curtsy of my grandfather- sorry to all those who live in  Montana. We actually like Montana.) 

But, geez again, I figure if I put so much time and effort putting the darn thing up on the wall and getting it how I want it to look then I had better use the one that looks the best. Even if that means I have to order more (my husband is going to kill me) and then wait for it to arrive (which means I'm even further behind than ever)
...sigh..

Anyway, if you're interested on participating, or following from afar (which is what I always used to do), click on the button below.

Feathers QAL

Also linking up with Freshly Pieced for WIP Wednesday

Monday 6 January 2014

Star Wars Quilt: Embroidery or Appliqueing with a Machine

I finally did something else on the Star Wars quilt that was suppose to be done for Christmas. I've decided though, after rushing through a quilt before, that it is better for me to lose the guilt and take my time to do this one right rather than try to get it done just for the sake of having it done (at least that is what I'm telling myself).
I gave the characters some more character via giving them actual features on their faces.  R2D2 and Boba didn't need any embellishment so I left them alone, but Yoda and Anakin definitely needed something.

I debated whether I should just paint the faces on using fabric paint or markers, or try to stick to an all fibre medium. In the end I did a combination of applique and embroidery
using my machine (cause I am NOT a hand stitcher folks! Ya, like waaay to lazy for that. And clumsy. I always draw blood and then it gets all over whatever I'm sewing...you get the picture.)

Anyway, I had some experience with applique and embroidery when I did a quiet book for my sons (FYI- any sentences with the words "quiet book" and "my sons" is a complete oxymoron, paradox, or lie).

I decided to applique the eyes using an iron-on adhesive and then stitch over them. I like Heat'n Bond. It's cheap. I can buy it locally, so I don't have to make a trip into the city, etc..
First I traced the outline of the faces onto paper. Using a window helps. Then I drew in the detail. I traced the shaped of each part of the eye onto the adhesive. Remember to flip your drawing over and use the reverse image when tracing onto the adhesive (I forget all the time and then I wonder why things are lining up as they should).

I used the Heat'n Bond Lite for the parts I knew I would be sewing over and the Ultra Hold for the small white and blue parts of the eyes, or the parts that I wouldn't be stitching over because they were too small.

I iron the adhesive onto the fabric, then I cut out the shape (I find it much easier this way). You peel off the paper backing and then iron them into place.
Once I had the eyes on I used a disappearing marker to trace in the rest of the lines.
Then I embroidered over the lines using my machine. I make sure to use a tear-away applique paper on the back to help stabilize the fabric and an open sewing foot.
The paper makes it easier to turn and slide the fabric the way you want as well. I also decrease the pressure on my sewing foot. I use a zig-zag stitch and set the stitch length quite small. I also use the stitch width at a small setting to start and increase it as I am stitching to created a line that goes from narrow to wide or that tapers to the shape I want. I have a manual dial at the top of my machine.
Afterwards you can rip the tear-away paper away and viola!
The whole process was less painful than I thought it would be. Procrastinated for nothing I guess. It actually went pretty smoothly and I was happy with the result (some lines are a little shaky, but oh well). It's always a surprise to me when I sew and it actually turns out to be easy AND exactly how I wanted it to be.
Now I just have to do the rest....